This is a bag which I made for my mom some time ago. You have very sharp eyes and can easily figured out how I assemble this bag with the help of photos.
I didn't work with pattern nor strict plan. The size can vary according to your preference. I measured one of bag I already have and decided the width and height considering the purpose of it. It should be big enough for mom to put some books and belongings when going to Mass. I'm always very GENEROUS with sizes so I can adjust when necessary instead of getting extremely anxious about correct numbers. This is my way of securing flexibility! It doesn't take a rocket scientist to sew....Right?
Here is how I did...
Before I start, one thing I really want to emphasize is to wash the fabrics or at least hot steam iron before measuring and cutting them to avoid shrink when you wash them with water in the future. 100% cotton can shrink at least 5%. So can linen. At least for me, quilted work should be washable! I toss most of my quilts into the washing machine drum inside mesh laundry bag.
1. For decoration I made some flower pedals using paper piecing with hexagon template. Then, attached them using blind stitches, namely Appliqued. Same for the leaves.

2. Exterior. Front side of bag. Same size for the backside. Place battings at the bottom and started quilting. Quilting method can be very personal and creative. Some people would quilt very densely to make it robust and some people like me who wants to speed up the process would just quilt only around the appliqued parts and some extras....
I used these pins specially for quilters. Very useful since you can get away with basting the fabric and battings. Either with pins or threads, we should secure the fabric and battings together before moving on to next step.

3. Prepare a long and wide strip like gusset(yellow lined piece) of bag and attach it to front then back of main body. Again the width will be vary and for the length I wasn't stingy and left enough extra cm...

Make seam open like photo to avoid bulkiness

Exterior main body is ready.
4. Time for lining.
A pocket can be handy... I made them for both sides.
(As you can see, I'm always generous with seam allowance since I can cut it later! :) but not the other way around.)
 \
\
and if you repeat the same process of exterior main body to the lining....

You get these set. (Frequent ironing is very rewarding.)

Insert lining into exterior body, wrong side facing each other...

Just pin them and leave it there, waiting for the handle and zipper wings..

5. Prepare handles. Make 4 strips. This strips will be inserted and sewn together with zipper wings to main body.

6. Zipper wings. Finished width should be more or less same with that of gusset.

One side...

Then the other side...

Wrap the head and tail of zipper with a piece of fabric nice and tidy...

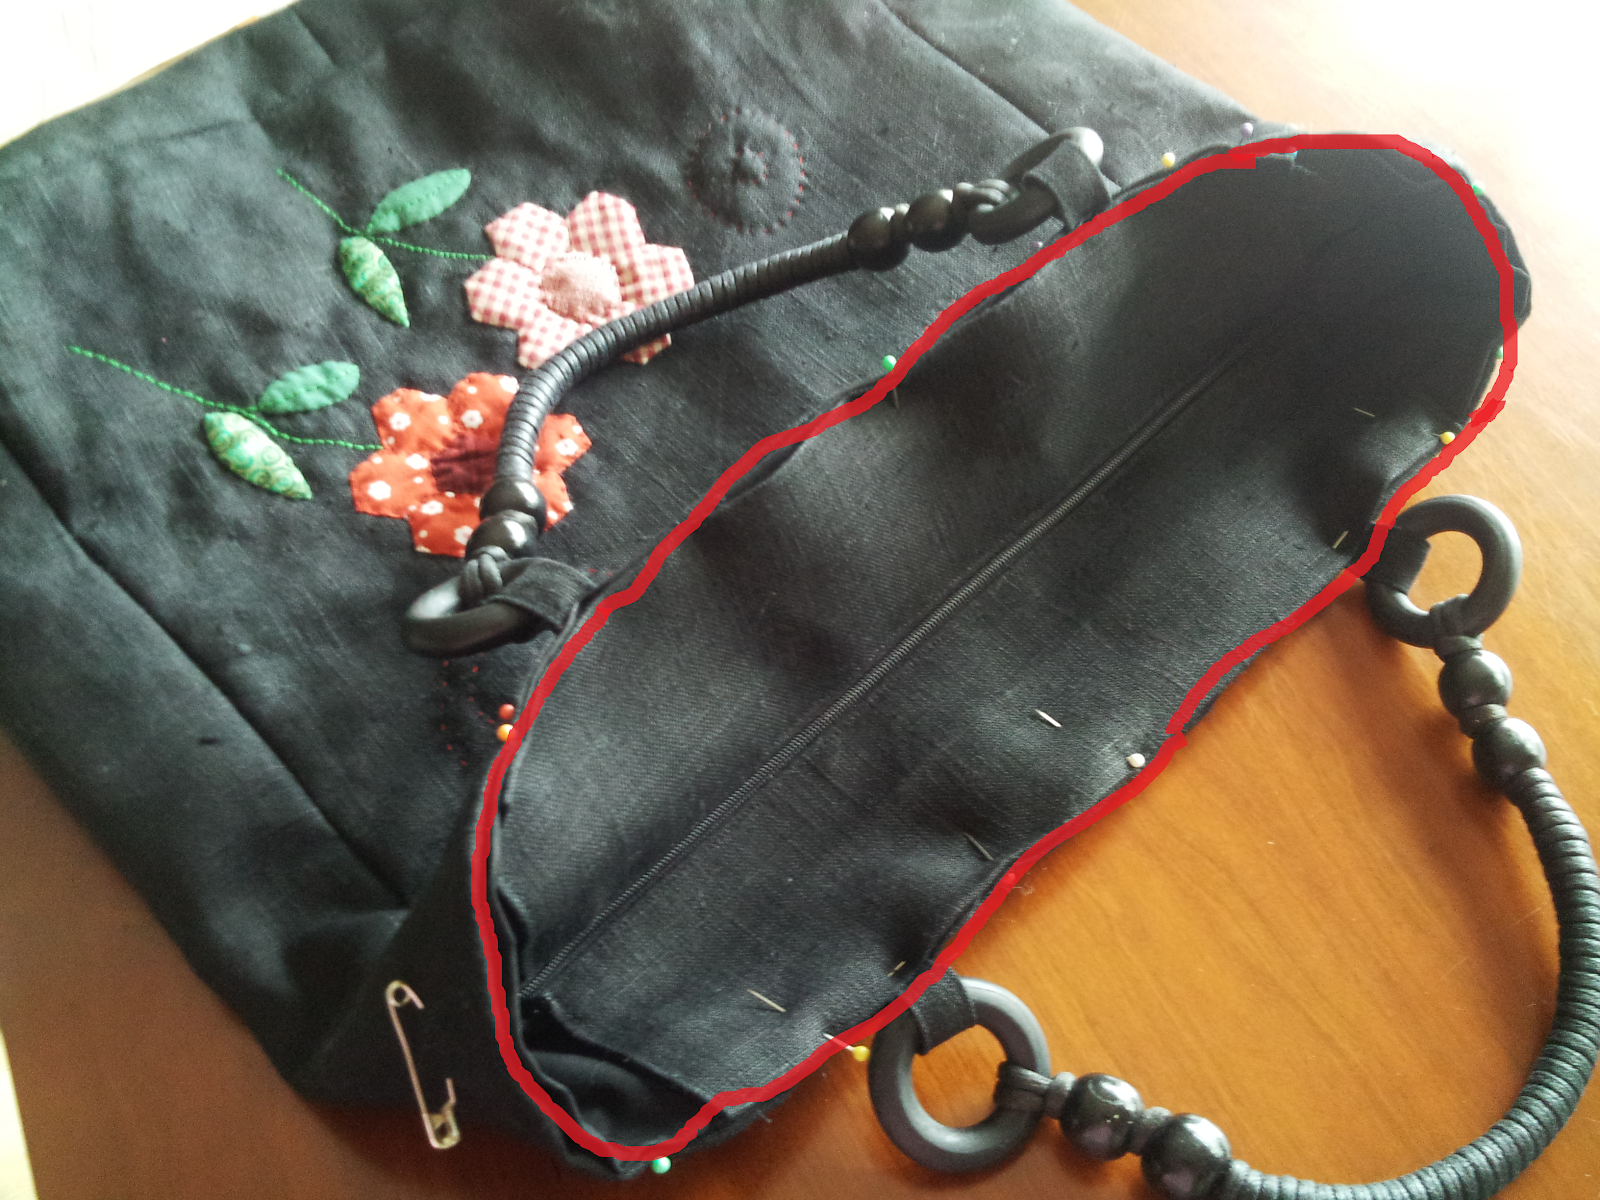
7. Final assembly.
Insert zipper wings and handle slips between exterior main body and lining. Stitch along the red line.
I forgot to take a picture of final look before I sent it to my mom! Probably this is the most similar one to the final look. (without the pins....)
